If your home is looking a bit worn or tired, a fresh application of paint will do wonders. Of course a professional painter will make sure your home looks absolutely fabulous. However if you have some spare time, there’s no reason you can’t do it yourself.
You may be tempted to pick up your paintbrush and get to work straight away, however you will most likely end up with a sloppy looking room. To ensure that your home looks professional it is essential that you follow all the steps that a professional would take.
We’ve put together a handy guide to ensure that your paint job will look beautiful and last for many years to come. You may have to spend a bit extra on preparation but it will be worth it in the end.
Purchase Your Equipment
The last thing that you want is to be in the middle of painting and realise that you don’t have the right paintbrush or you have forgotten to buy a paint tray. So before you do anything, think about what you are painting and the tools and equipment you will need.
If your painting the ceiling you will want to buy an extension pole or stepladder. If your walls are in poor condition you will need to purchase sandpaper and a putty knife. Carefully list everything you need and visit the home store before you start work.
Prepare Your Rooms
One of the most important steps you need to do is prepare your rooms. This will ensure that any spillages and splatters of paint won’t ruin your windows, woodwork and furniture. The first thing you need to do is move bulky furnishings so you can easily access all surfaces.
Next, you will need to purchase double sheets and lay these across your floors. Carefully tape up the the sheeting to the edge of your skirting boards. This will ensure that any paint will drip harmlessly onto your sheeting and will not ruin your carpets.
You should also make sure that all furnishings and furniture that will remain in the room is covered. Double check everything because, the last thing you want is anything being splattered with paint.
Prepare Your Walls and Ceilings
The next step is to prepare your walls and ceilings. If your walls are dirty, cracked and full of holes this will affect the paint. Paint lasts longest and looks the best when it is applied to smooth, flat surfaces. It won’t be very fun, but your job is to get your walls back into good shape.
Have you found any holes in your walls? These need to be filled. Any lumps? Then these need to be sanded down. Every imperfection has to be rectified. By the end of all your hard work, you should have the perfect wall that is ready to paint!
Prime Your Walls
Your walls then need to be covered with primer. You don’t actually have to apply primer before the paint, however it will make sure your paint adheres to the wall. Without primer, your paint can actually peel, especially in humid conditions.
Most importantly, primer will make your paint look even better as it prevents any discolouration. If your walls are made from fresh plaster, mist coat before painting. Mist coat is part water and part paint, and can be applied as a primer.
Start Painting
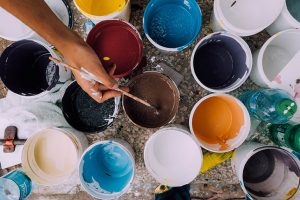
Mix all of your paints so all colours look uniform then start from the top and work your down downwards. Use a roller to paint the main surface of the wall and avoid the corners and edges. Use a suitably sized brush for these areas.
When the paint is dry to the touch, this means that you can apply another coat. If you won’t have everything finished in one day, make sure you remove any excess paint from your brushes and clean them so they are ready for the next day.
Clean Up
When you have finished all painting, remove all tape and sheeting, making sure that all paint splatters are completely dry. Save money in the long run by carefully cleaning all of your paint brushes with soap and water for water based paints, and mineral spirits for oil based paints.